Sunday, 4 February 2018

Lotus Domino to Exchange Migration Without Using MS Transport Suite

With the growing popularity of Microsoft Exchange, the world has also seen the decline of Lotus Domino in recent time. Every day, people switch to Exchange Server from Lotus Notes. Many other willing users are unaware of the migration methods. For these group of people, this blog will be beneficial. The reason is, it will discuss Lotus Domino to Exchange export techniques in detail. Other necessary information about Lotus Notes to Exchange Server migration will also be covered in this post. Let us get started with the necessity of IBM Domino Server to Microsoft Exchange Server conversion. You can even try an automated solution i.e SysTools Mail Migration Wizard to export Lotus Notes email to Exchange.


Necessity of Lotus Notes to Exchange Conversion

Users face the necessity of Lotus Notes data migration to Exchange for various reasons.

  1. Complete Migration: Many organizations switch from Lotus Notes to O365 for better facilities. In this case, they need to export Domino Server data to Exchange Server for obvious reasons.
  2. Data Synchronization: Sometimes, it becomes necessary to synchronize data between these two servers. For this reason, users want to migrate data from IBM Domino to Exchange.

How to Migrate Lotus Domino Items to Exchange

There are two techniques to export IBM Lotus Domino to Exchange. We will call the first one as conventional technique and another one as trouble-free technique. Users will learn about both the techniques from this post.

Conventional Technique to Convert IBM Lotus Notes to Exchange

Earlier, traditional Lotus Domino files to Exchange migration was possible using Microsoft Transporter Suite. This suite has been discontinued by Microsoft in 2007. Since then, ‘Exchange 2007 bridgehead server’ (within Exchange 2013 environment) is used for Domino Server to Exchange migration. As this conventional technique is complex, we will briefly know about steps of executing this process. The steps are:

i. Pre-Migration Assessment: This is the first step of the whole migration process. You need to gather complete knowledge about resources and requirements in this stage.

ii. Confirming Coexistence of Lotus Domino and MS Exchange: For directory synchronization, make sure you have both Lotus Domino and Exchange before export.

iii. Provisioning Exchange Mailbox: This step is closely related to coexistence. Users are pre-provisioned as contacts in Exchange, that route the mail back to Domino.

iv. Setting Migration Baseline: This step includes knowing how fast the data travels in your environment. This information allows you to plan migration activities properly.

v. Performing a Pilot Export: The aim of this step is to know upcoming challenges practically. Even more, challenges should be expected during the actual conversion process.

vi. Data Storage Designing: The required data space for resultant data can largely vary from the source data space. Users must calculate it and act accordingly before export.

vii. Migrate Domino to Exchange and Follow Its Progress: In this final step, the migration is done. Organizations should analyze the migration report to find out success rate.

Challenges Encountered While Exporting Lotus Domino to Exchange

This conventional method is not only extravagant but also complex in nature. Users face these challenges while implementing the conventional method for Lotus Notes migration:


1. It takes a significant amount of time to completely execute this conversion process manually. Apart from this, money and other resources are also been consumed in this process.
2. Organizations should know about required resources and potential risks of this export process. Experts should be consulted for a suggestion. Otherwise, the company can face severe data loss and other issues.
3. If necessary amount of investment, manpower, tool and time are not available, migration process might stop in midway. Organizations should be aware of these issues before starting the process.
4.Different types of logistical challenges also appear while implementing the conventional method. These include migration scheduling, training users, and providing support for them after the migration is over.

Trouble-Free Technique to Convert Lotus Notes to MS Exchange

The discussion distinctly shows the difficulty level of performing IBM Domino to Exchange 2013 migration conventionally. To avoid all these troubles, users can choose trouble-free technique of using Mail Migration Wizard. This program exempts users from all the hassle and conveniently exports Lotus Domino to Exchange. This tool can convert Lotus Notes NSF files to Exchange Server in a batch efficiently. This program is capable of decrypting encrypted NSF files before migration. The tool requires Lotus Notes 9.0 or below versions to be installed for migration. Here are some of the highlighted features of this application:

1. Migrates multiple Domino Server Mailboxes to Exchange in a batch
2. Mailbox Mapping option available for direct migration to Exchange
3. Also contains option to translate Canonical Name into SMTP format
4. Supports Calendar Recurrence during Lotus Notes Calendar export
5. Retains original Message Internet Header and Read/Unread status
6. Live Exchange Server and Domino Server are required for migration.
7. Installation of Lotus Notes 9.0 or any other version is compulsory
8. Supports Exchange Server 2016, 2013, 2010, 2007, 2003, & 2000
Conclusion

In a nutshell, the conventional or manual method of Lotus Domino to Exchange migration is almost impossible to perform. The only other option left for the users is using the tool mentioned in the post. This software can convert multiple Lotus Notes mailboxes into MS Exchange easily. Mailbox mapping and canonical name translation are also possible with the help of this program. Users can use this software to transfer Domino Server to Exchange in a short time.

Friday, 2 February 2018

Convert Excel Contacts to vCard File Format – Best Solution


Best techniques to Convert Excel contacts into vCard, VCF file format. To know how to convert Excel contacts to vCard format successfully, users are required to perform the procedures sequentially. The manual and Online solution is available to export Excel contacts to vCard.

A Brief Introduction to vCard (Virtual Contact File)

The Virtual Contact File or vCard is an electronic business card that is used for different reasons. This file is used as an email attachment in exchange address book entity in worldwide. A vCard file encompasses many attributes as the name of the employee, email id, contact number, business address, home address, photographs etc. Via a VCF, users can interchange contacts details over electronic devices. A vCard file is compatible with Windows OS, Android, iOS, Mac, etc.

Sunday, 21 January 2018

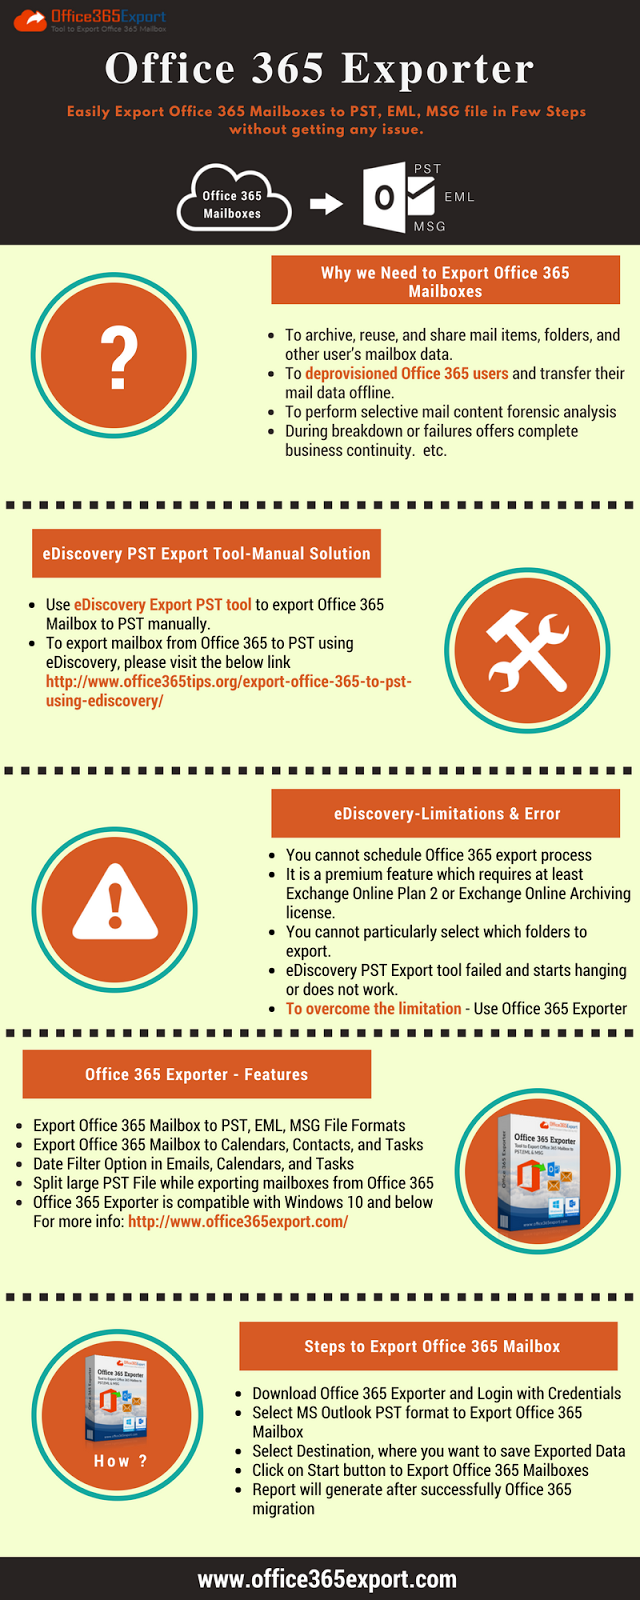
How to Convert Office 365 Mailbox to Outlook PST Within Few DIY Steps

In this blog, we will help Office 365 users easily convert Office 365 mailbox to PST in an effortless manner. Using this guide, each user can export their Office 365 mailbox data into Outlook PST format as a backup file or offline access to their data in MS Outlook. 

Issues with Office 365

Overall Office 365 seems perfect Office suite but is not, at some points. Users need an active internet connection every time to access an Office 365 mailbox. Maybe it is possible that you are connected to the server 24x7, but sometimes there are issues like server malfunction or server down which makes you unable to access your Office 365 mailbox because Office 365 mailbox doesn’t work offline.
Another issue with Office 365 is you need to pay a monthly or yearly subscription fee to access the cloud storage Office 365 account. Moreover, only an active account of Office 365 will allow you to access your Office 365 functions. The overall subscription is a must to access Office 365 functionalities.

Moreover, some users are not so comfortable using cloud techniques as they are not so used to it. Hence a non-technical user faces a lot of issues with Office 365. Therefore, users want to migrate from Office 365 to Outlook desktop-based email client.

Method Convert Office 365 Mailbox to PST 

As you cannot access your Office 365 mailbox offline there is the need of migrating the email client catches the light. Because users needed to access useful Office 365 documents anywhere anytime and depending upon the web every time is not an option. This is why many user switch their mail client to Outlook (the most common desktop-based mail client).


Convert Office 365 Mailbox to Outlook

Well, you can easily convert Office 365 mailbox to PST but doing it manually is not a good idea. As manual conversion is not possible here because you have to deal with both server-side and client-side applications hence better to try with some reliable Office 365 to Outlook converter tool.
The tool to convert Office 365 mailbox to Outlook is the one and the only tool of its kind which provides complete migration from Office 365 account to Outlook.

With the help of the utility, you can easily convert Office 365 to PST, most important thing to be noted is you can now access your Office 365 mailbox, contacts, calendars offline without any restriction of internet connection or subscription or any active Office 365 account.
It provides complete conversion of Office 365 mailbox to Outlook along with emails, contacts & calendars. Other options like Date filters and much more are also embedded inside the utility.

Steps to Convert Office 365 Mailbox to PST

To convert Office 365 mailbox to PST, you have to follow some simple DIY steps mentioned below:

1. Download Office 365 Export PST tool and double click to execute.

2. You will see the first screen asking for login in your Office 365 account.


3. After successful login the next screen asks you to convert Office 365 mailbox to PST file format.


4. The tool also allows you to specify a local destination path for your converted Office 365 mailbox storage. Click browse option for this.


5. After specifying the destination location, proceed next by clicking on Start button.

6. The start option will start the process of saving the Office 365 mailboxes into local machine. You cansee the live status too of the process.


7. Within few seconds the process of Office 365 mailbox to PST conversion completed. You will get acknowledge of completion.

8. The converted Office 365 mailbox to PST are stored in the location you specified. Now you can easily access your mailboxes by importing the PST file into Outlook.

Conclusion

The utility is used to Convert Office 365 mailbox to PST in few easy steps. It makes you able to access Office 365 mailbox offline. Moreover, you can export Office 365 contacts, emails & calendar to PST file. After converting Office 365 mailboxes locally, you can access them from anywhere anytime locally. Powerful features of Office 365 to Outlook converter tool is the filter options provided like Date filter, naming convention specific folder selection etc. Additional export format EML also help for you to share.


Tuesday, 16 January 2018

How to Export Yahoo Contacts To Outlook: 2 Best Manual Techniques

Time passes but the people you connect with remains almost same. Nowadays people usually, accumulate their contacts on the cloud to stay assured that their contacts will remain with them forever. Generally, people backup contacts in web-based email clients like Yahoo so that they can access it from anywhere but, what will happen if the Yahoo account you are using gets crashed. For a safer side, you should always keep an archive of your Yahoo Address Book in the desktop based email clients like Outlook. In this article, we will discuss about how to export Yahoo contacts to Outlook .

Yahoo is one of those web-based email clients which provides all the advanced features like contacts import/export, calender, etc. The contact file which is created in Yahoo can be converted in many formats like vCard, CSV, etc.You can save vCard to Outlook contacts to backup your contacts. But it is suggested that you always import your Yahoo Contacts to vCard format only. vCard is supported by almost all the mail clients and platforms. Then, that vCard file is transfer to Outlook 2013 / 2010 / 2007 / 2003 / 2000.

Why Only Outlook?
Before proceeding towards the steps to export Yahoo Contacts to Outlook, we should be aware of the fact "why only Outlook" as there are many other desktop based email clients are available.
The reasons are quite simple ;
1. Outlook keeps all the files in only one format i.e., PST file
2. It is easy to move Yahoo Address Book to Outlook 2013.
3. Outlook stores data on the local server which means no loss of information even if the mail account crashed.
4. You can also import many other contact file formats to the Outlook 2013 / 2010 / 2007.

Need to Transfer Yahoo Address Book to Outlook
Let's consider the following scenario from a user query trying to backupYahoo Contacts to Outlook 2013 / 2010
"I have stored all my contacts to Yahoo mail but I am not able to access my contacts due to some issues in my Yahoo mail. Now, I don't know how to view my address book as they contain very important contacts of my business partner. Can I export Yahoo Contacts to Outlook?"

"I want to saveYahoo Contacts to Outlook 2013 because I do not have internet access all the time. My 90% work is done from desktop and I want transfer Yahoo Address Book to Outlook."

Are you familiar with this situation ? Does the query seem similar to you?
Do not worry, in the next section we will be explaning the manual solution to the problem.

How to Export Yahoo Contacts to Outlook Manually
Yahoo Contacts can easily be converted to Outlook PST file by using one of the following methods
METHOD 1: Convert Yahoo Contacts to Comma Separated Values
1. Open your Yahoo Account.
2. Go to the Contacts.
3. Select the contacts you want to export and then click on the "Action"
4. Then choose Export & select the first option Microsoft Outlook
5. The contact will be saved as a .csv file on your system, then you can import it in Outlook.

METHOD 2: Convert Yahoo Contacts to vCard File
1. Open your Yahoo Account.
2. Go to the Contacts.
3. Select the contacts you want to export and then click on the "Action"
4. Then choose Export & select the fourth option vCard file
5. The contact will be saved in vCard format.
The above mentioned method is a two step process. First, you have to convert Yahoo Contacts to vCard or Comma Separated Values. Then, save Yahoo Address Book to Outlook 2013 / 2010 / 2007. By using any of the technique, you can export Yahoo Contacts to Outlook 2013.

Importing vCard to Outlook
1. Open your Outlook account and choose File from the navigation wizard
2. Select Import/Export option. A dialog box will appear
3. Select "Import a vCard File" and click on NEXT
4. Select the file format in which you want to import
5. Select the file which you want to import
6. Click on Next and then Finish

Limitations of Manual Method to Export Yahoo Contacts to Outlook
There are many drawbacks of the manual method. Some of them are listed below:
1. Manual method requires some basic technical knowledge of data files
2. Contact information can be mismatched during conversion of one file to another.
3. Manual method is a long two step process and takes more than the required time
4. This method is not reliable for large number of contacts.
5. Manual method cannot be used to import multiple vCard files at the same time.

Alternative Solution
The above mentioned method is quite useful but it lose its credebility when we want to export multiple contacts at the same time. We have a much better solution to move Yahoo Address Book to Outlook. You can use vCard Importer tool to import all your contact from any email client whether Web-based clients like Yahoo or desktop based like Thunderbird. The tool is just marvelous in its area. The vCard Importer Software will batch import all your vCard files to Outlook.

Conclusion

From above discussion, it is clear that you can export Yahoo Contacts to Outlook with manual method as well as automated tool. Both the method can somehow import contacts to Outlook but it is highly recommended to use software as it will backup all your Yahoo Address Book to Outlook without any hassle.

Monday, 8 January 2018

Unable to Initialize the Microsoft Exchange Information Store Service Error Fixed

Solve Unable to Initialize the Microsoft Exchange Information Store Service Error 0x8004010f


If you are getting this Unable to Initialize the Microsoft Exchange Store Service 0x8004010f error in Exchange then you can resolve it by following the methods mentioned in the below segment. This article also explains the root causes of the issue so that users can rectify the issues due to which this error occurs.
Microsoft Exchange users have to face various types of errors each one due to different reason. The primary task of every administrator is to deal with such errors. One such error is Unable to Initialize the Microsoft Exchange Store Service 0x8004010f error which is shown when the users fail to initialize the information store even when the Microsoft Exchange Server is started many times.

Quick Solution: Users can go for a third party application i.e. Best EDB to PST Converter if they want an efficient solution to resolve the error.

This issue generally occurs when the Exchange Server fails to initialize the Exchange Information Store because the clock on the client computer and the Server computer is not synchronized properly. Due to this, the time change is recorded at the client side or on the server side.

Causes of Unable to Initialize the Microsoft Exchange Information Store Service 0x8004010f Error

The above mentioned issue is an indication that the Information Store services cannot be initiated by the Exchange Server. The management pack for MS operations manager continuously keeps track of Windows application log machines which are running on the Server. It generates the error when the Windows in unable to start the store service on the local machine.
When the service of Microsoft Exchange information store starts, it looks for the default recipient policy in Exchange Server. The possible causes of the issue can be any of the following two conditions:

• When the default policy from Email Address Policies tab gets deleted.
• Replacement of default policy by a custom email address policy.

Steps to Resolve Exchange Error 0x8004010f Manually

Important Note: The user should have administrative rights before starting the resolution process.

1. Open Run console and type Adsiedit.msc in it, then click OK.
2. In the Action menu, press Connect to option.
3. Here, “Select a well-known Naming Context” box will be displayed. Go to its Configuration option and click OK.
4. Expand the following option to continue the process:

• Configuration (The_Domain_Controller_Name .The_Name_Of_The_Domain . Com)
• CN=Configuration, DC= domain, DC=com
• CN=Services
• CN=Microsoft Exchange
• CN=Organization
• CN=Recipient Policies

5. Now, right-click on the Email Address Policy. Then, choose Properties from the option.
6. Navigate to Attribute option and choose purportedSearch. Here, validate that the value is (mailNickname=*).

Important Note: If the value of purportedSearch is not the same as mentioned. Then, change it manually by performing the steps below:
a) Go to purportedSearch and click on Edit option.
b) Click on Clear option and enter (mailNickname=*) in the field and then press OK to save it.

7. Visit Attribute and select msExchPolicyOrder option. Then, click Edit option.
8. Click Clear option, enter 2147483647 in the field. Then, double-click on the OK button.
9. Now, quit the Active Directory Service Interfaces.
10. Finally, restart the server to check whether the error is removed or not.

Limitations of Manual Procedure

There are some limitations which are associated with the manual method due to which many other issues can occur during the process. It requires so much time and efforts by the users to complete the method in a secure way. Another limitation is that, the method might feel difficult to execute for the users who are not technically strong as any mistake throughout the process can cause permanent data loss. In some situations, the users even fail to remove the issue using the manual procedure. In those scenarios, it is best to use a third party application which is explained below.

Efficient Solution to Fix Unable to Initialize the Microsoft Exchange Information Store Service Error

If a user wants to rectify the Exchange error 0x8004010f in a secure and reliable way, then it is suggested to go for the professional application. Using this solution, users can transfer their inaccessible Exchange mailbox data into Outlook data file format. If there is any corruption issue in the Exchange database, then also this software can fix the damage and then move it to PST format. The application ensures that the entire conversion process is carried out in a secure and reliable way without losing any data. The tool is loaded with a set of advanced features which makes it unique solution among other available software. Let us have a look at the features offered by it:

• Add multiple EDB files at one time for batch migration
• Scan & Remove corruption from Exchange Database
• Offers preview in 7+ different view modes
• Option to export data in 7 file formats
• Application supports Windows 10 & other below versions

Conclusion

Users who are facing Unable to Initialize the Microsoft Exchange Store Service 0x8004010f error while accessing their Microsoft Exchange Server knows that how difficult and crucial it is to resolve the issue. This error with event ID 5000 puts the entire Exchange database at risk including the private and public folders. Therefore, it is really important to fix the error as soon as possible. In this article, we have shared both manual and automated solutions to rectify the issue. Users can choose the option which best fits their requirements.

Saturday, 6 January 2018

Unable to Open EML File Attachments in Outlook: Expert solution

EML File is an essential file type of various email clients like Microsoft Outlook Express, Thunderbird etc. but, it is not supported by Outlook 2016 / 2013 / 2010 / 2007 / 2003. Let us take a look at the query of a user who is unable to open EML file attachments in Outlook. 

“I had received an EML attachment file in my Outlook 2007 account. When I tried to open it, it opened in EML supportive clients like Outlook Express but, not in Outlook. Even though its completely normal since Outlook does not support EML file format. I wanted to know if I can  view EML file in Outlook? If yes, then how?”

Are you also going through the same dilemma? Well, here you will find all the answers when you cannot open EML file in Outlook. 

How to open EML File in Outlook 2007 Windows 7
Broadly classifying, there are two methods to view EML file attachments in Outlook.
 These are:
         1. Manual method
         2. Automated method

In the manual method, a user needs to perform all the steps manually whereas, in the automated method, all the steps are performed with the help of software. 
Let us go through them in detail.

Manual method: Edit Registry
The manual method is edit registry when a user is unable to open EML file attachments in Outlook 2007. To use this technique, make sure that you are using Outlook 2007, Windows 7 64-bit Operating System and Windows Live Mail is installed in your system. 
The steps to read EML file in Outlook are explained as follows:

1. Press Windows key+R to open Run command
2. Type regedit to open registry editor. 
3. Select HKEY_LOCAL_MACHINE >> Software >> Classes >> Microsoft Internet Mail Message WLMail >> shell >> open >> command
4. In the command line, here it is written:
C:\Program Files (x86)\Windows Live\Mail\wlmail.exe" /EML:%1 
5. Change the stated line to:
"C:\Program Files (x86)\Microsoft Office\Office12\Outlook.EXE" /EML "%1"

In this method, you have defrauded the registry. Microsoft Windows still believes that the Windows Live Mail is the default application to open EML file attachments. But, you have changed the path in registry due to which instead of opening Windows Live Mail, it opens outlook.exe. In other words, if you open Control Panel and select default programs, it will show Windows Live Mail is associated with EML files but, Outlook will open instead. 


Limitations of Manual Process to Read EML Files in Outlook 2007
There are many drawbacks associated with the manual method. Some of them are listed below: 
      1. A user needs to have deep technical knowledge regarding EML file, Outlook and computer system. 
      2 .Even a minor mistake while executing the process can result in loss of data.
      3. Many steps are involved thus, making it a lengthy and time-consuming process.

      Due to all these limitations, manual approach to view EML File in Outlook is not considered the right approach. An alternative to the solution is to use automated tool. 

Automated solution
An automated utility is done with the help of third party tool like SysTools EML Viewer. According to the experts, it is the master solution to read EML file attachments in Outlook 2016 / 2013 / 2010 / 2007 / 2003. Also, if users need to export multiple EML files attachments to Outlook, they can use another software like  EML to PST Converter. 

Conclusion
An email can consist of text files and attachments. Simple attachments can be opened with any email client but, to view attachments of the EML file in Outlook is somewhat a difficult task. A user can view EML file attachments without Outlook if, he has other email clients. But to read EML File in Outlook, a user can go with the manual method or automated utility. 
In manual solution, users need to trick the registry editor. So, Windows OS thinks file is being opened from Windows Live Mail. But, in actual, the file is in Outlook. The technique requires steps to be performed manually, hence it is not considered as an ideal method. An alternative solution when a user is unable to open EML file attachments in Outlook is to use third party tool. The software like EML Viewer helps to preview EML file attachments very effectively. For bulk importing of EML file in Outlook, a user can do with SysTools EML to PST Converter. 


Tuesday, 2 January 2018

Techniques to Sync Outlook Contacts with Android via Google – Effortless Solution


In this fast-paced world, people have to deal with the number of devices and email accounts. For example, a person might be having a computer at home, a laptop in the office and a smartphone with them all the time. At the same time, it is required that the devices should remain synchronized to avoid any trouble in professional and personal life. As we all know that performing the task of synchronizing is very important for multiple device users, therefore, this blog will focus on how to transfer contacts from PST to Android? Whoever is using an Android device might want to sync Outlook Contacts with Android via Google.  Read this blog in detail to understand the procedure to perform this migration task. But, before discussing the solution, the need will be described in brief.

Necessity for Synchronization

Outlook has been developed by Microsoft to manage emails, contacts, calendar, etc. This is a desktop-based email client so all its data is stored within a single system. Suppose a user is having Outlook at home or office, and an Android device for personal use. The Outlook contacts have to be synced to Android device to access from anywhere. This difference between Operating Systems and between emails clients are the reason behind the need of synchronization. A related query is discussed below to understand the situation often faced by the people:

“How can I sync my Outlook Contacts to Android by using Google? I use Outlook in my office but want to Sync Outlook Contacts with Android via Google so that I can access them from anywhere, even when I am at home or on my way to the office. Is there any way by which I can do the synchronization?”

This question explains that users are often in need of Syncing Outlook Contact book to Android via Google. This need can be met by using Google itself. This process is called the manual method, as all the steps have to be done by the user.

Techniques to Sync Outlook Contacts with Android via Google

The entire process of Exporting Outlook Contacts to Android can be separated into three main parts. The complete guide of the manual technique is described here systematically.

Method 1: Using Google to Sync Outlook contacts with Android Tablet via Google

Exporting Outlook Contacts

1. Open Outlook and Click on File from the Menu and Click Open and Export. Now click Import/Export button to open the Import and Export Wizard.
2. On the Wizard, Select Export to a File and hit Next.
3. Select the option of Comma Separated Values and then click Next.
4. Under the heading of Personal Folder, click Contacts > Next
5. Click Browse to go to the location you want to save the converted contacts. Enter a file name and click OK> Next.
6. Click Finish to complete the migration of Outlook Contacts.

Importing to Gmail

1. Log on to your Gmail account from the computer.
2. Click on the Gmail on the top left to get a drop-down menu and click on Contacts from the options to open a new window.
3. Now, click on Import Contacts from the left side, another window will appear to let you select the CSV file.
4. Click on Choose File and select the CSV file you want to import here.
5. Now click Import button to finish the process.

Syncing the Android Device

After syncing to the Gmail account is done, it can be accessed from the Android devices also. If for any reason the syncing is not visible from the Android device, follow these steps:
1. Open Contacts.
2. Click on Menu button.
3. Now, Tap Accounts and then Tap into your Google account.
4. Click Menu again.
5. Then, Tap Sync Now. This should complete the whole process to sync Outlook contacts with Android via Google.

Disadvantages Of Manual Method

1. Time-taking Process: It is evident that the whole business of migrating Outlook Contact Group to Android devices is a time taking process.
2. Direct Involvement Required: During every step, the direct involvement of the user is needed.
3. User Needs Patience: To perform this systematic process, the user patience is necessary.

Method 2: Quick Solution to Sync Outlook Contacts with Android via Google

If the user does not have time or patience to perform this procedure, they can easily opt for a quick and reliable solution. Using third-party tools is an option for performing the syncing operation. vCard Export Tool is a fantastic software that can conduct the synchronization easily without any continuous supervision. It transforms PST files to vCard quickly and effortlessly. It also bears the feature of previewing all attributes of Outlook Contacts in vCard format. For quick export of Outlook Contacts, this software provides a reliable solution.

Concluding Words

To stay updated in this world, people need to keep their devices synced. Just because a person is using different OS, does not mean that they are supposed to have issues with Address book syncing. To sync Outlook contacts with Android via Google is possible manually. However, it takes a lot of time, which many cannot afford with their busy lifestyle. For them, the best solution to synchronize Outlook contacts to Android is vCard Tool. This application does not only migrate Outlook Contacts to Android quickly, it saves your effort for performing the whole activity. By saving time and effort, this software offers a great help to all the professionals.